This article explains how you can rapidly and easily load finished jewellery samples to your Masterline and build your digital catalogue.
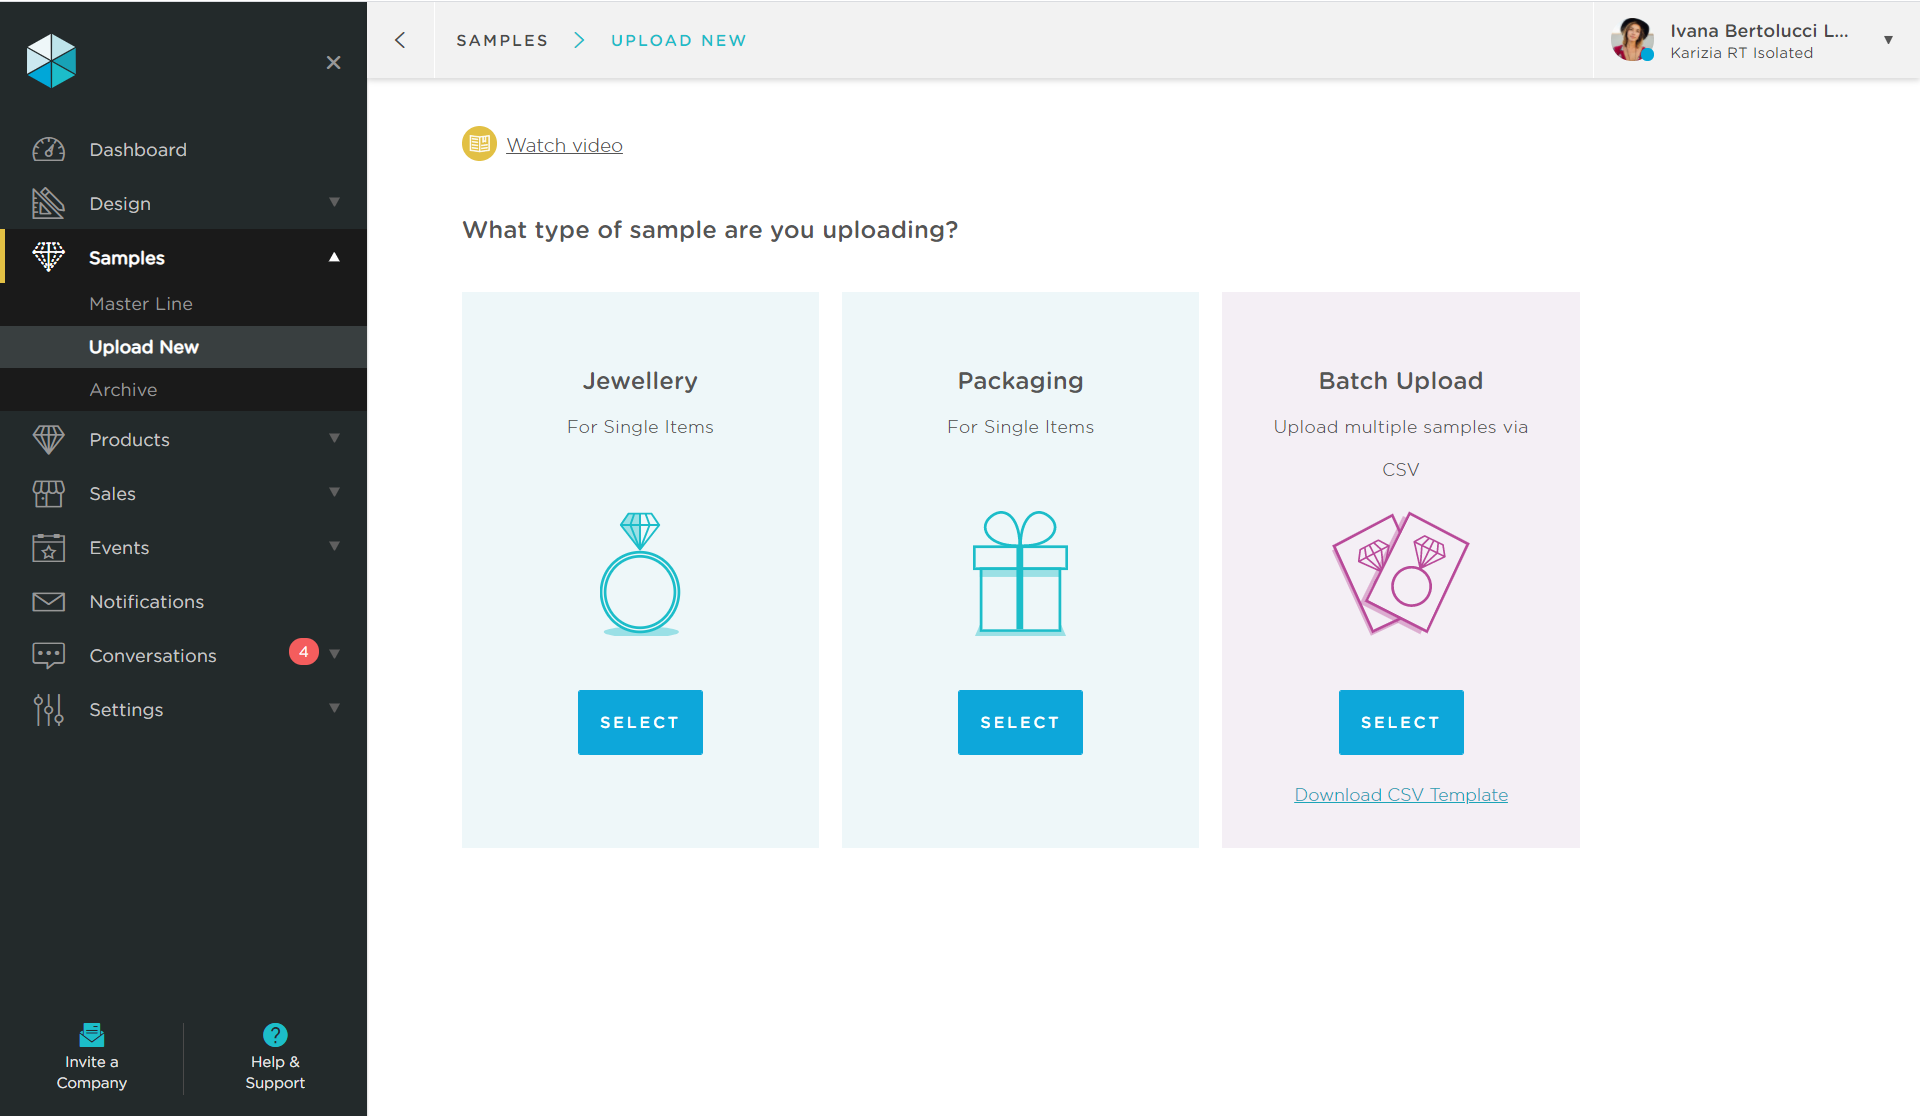
Step 1: In your Samples > Masterline, navigate to Upload New page and click on 3rd Option Batch Upload.
Step 2: Download the CSV data entry template from the link visible in the upper right hand side of this screen.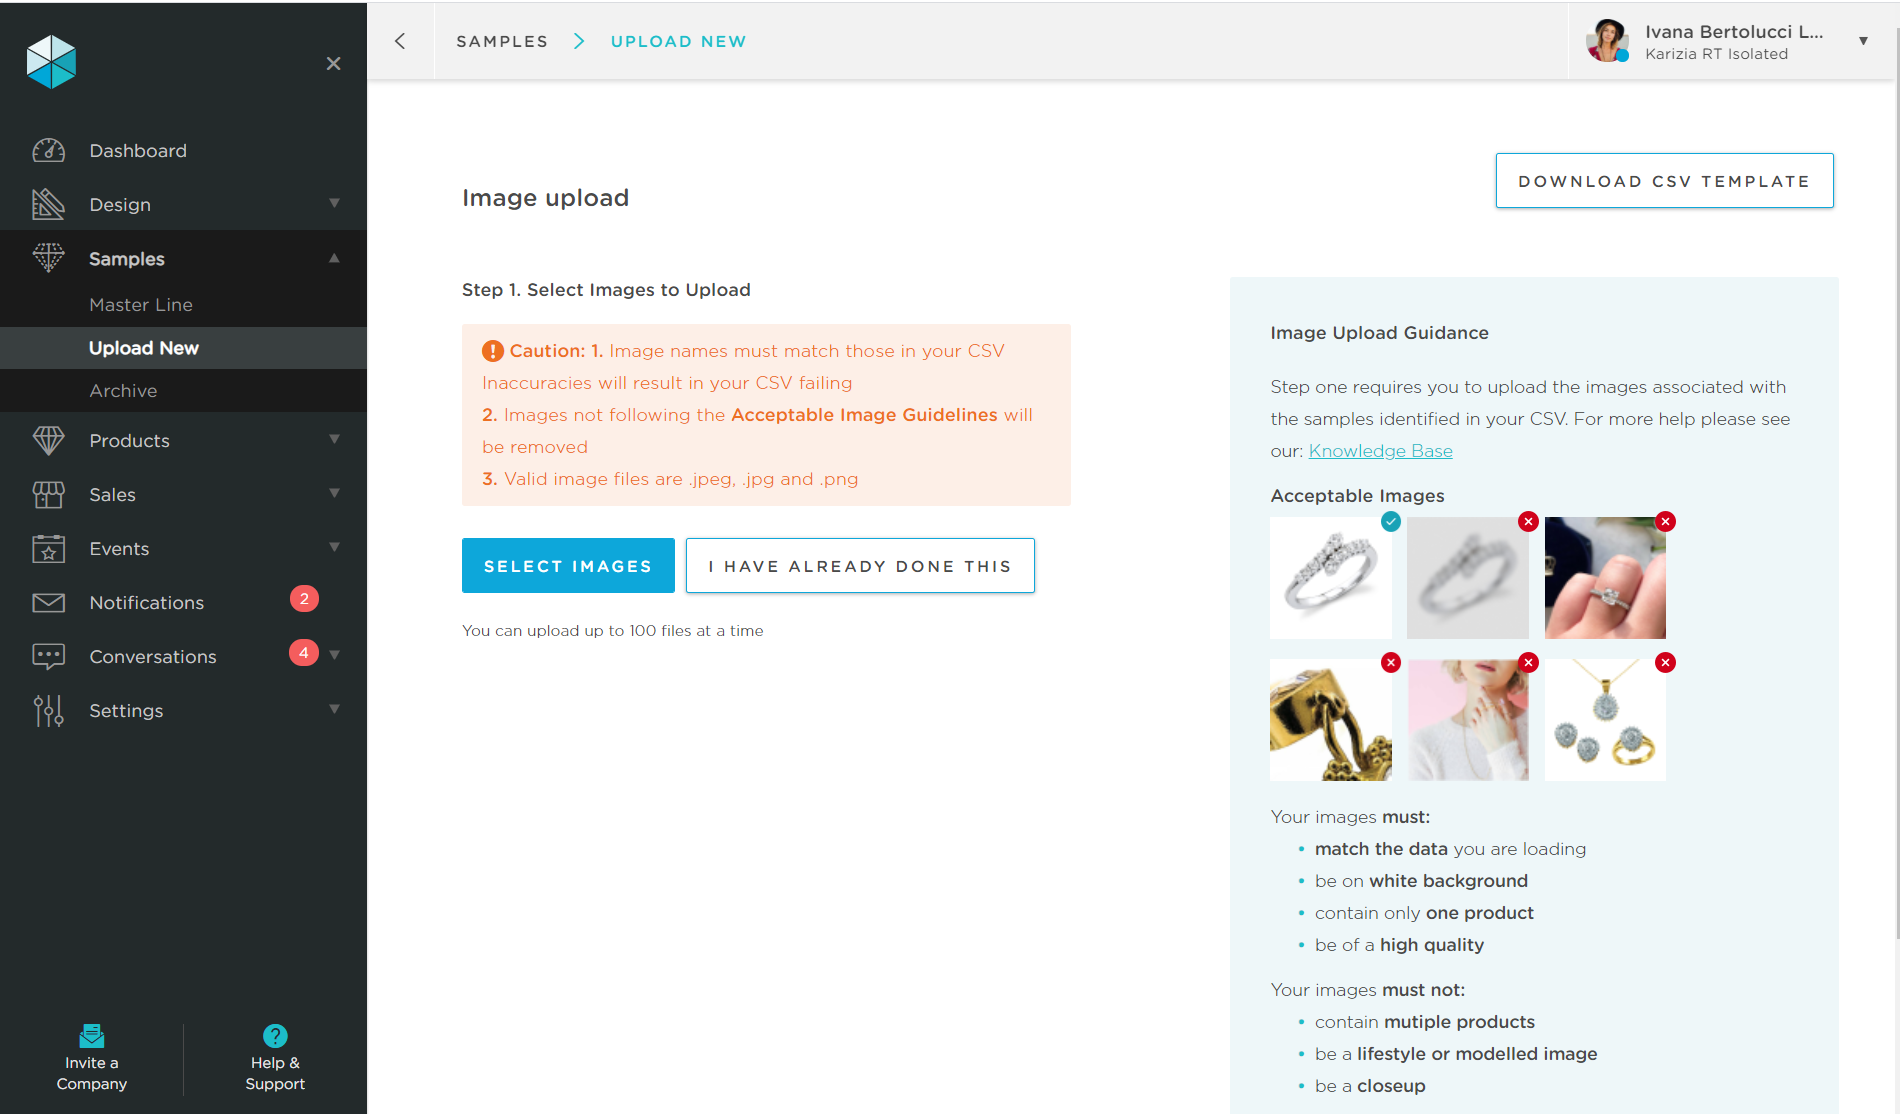
📔 Did you know? CSV stands for Comma Separated Values. It is the universal format computers use to share information with each other. It can be opened and edited in Microsoft Excel, but be sure to save as file type = .CSV after you complete any editing.
Here is what the CSV looks like when opened in Excel.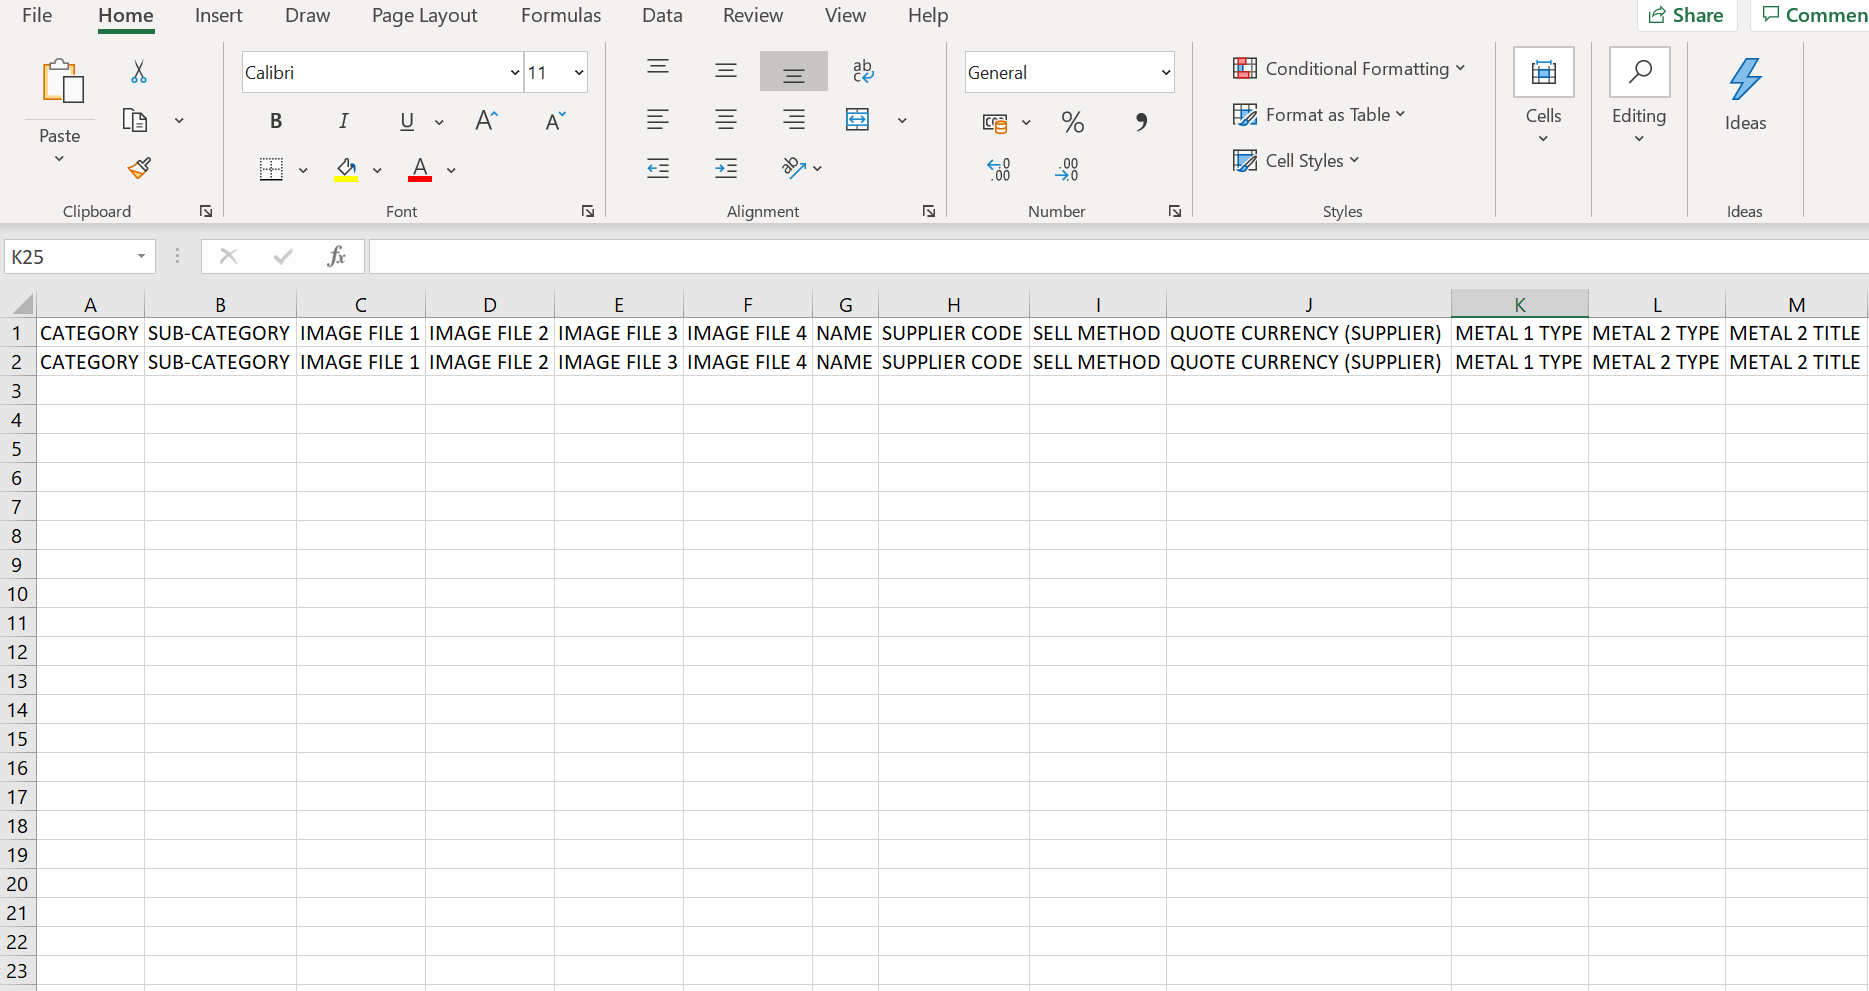
Step 3. Complete data to create the CSV file. Data can be populated in CSV file via 2 options:
Option 1. Using our Transformation Service
- Recommended for manufacturers with sample lines over 5,000 samples
- Click here for details on the process
- This service is completely Free of Charge to companies who are on Standard, Professional or Enterprise Atelier payment plans
- This service is not available to companies on the Free plan
Option 2. Using our Atelier Input file which you can click here to download.
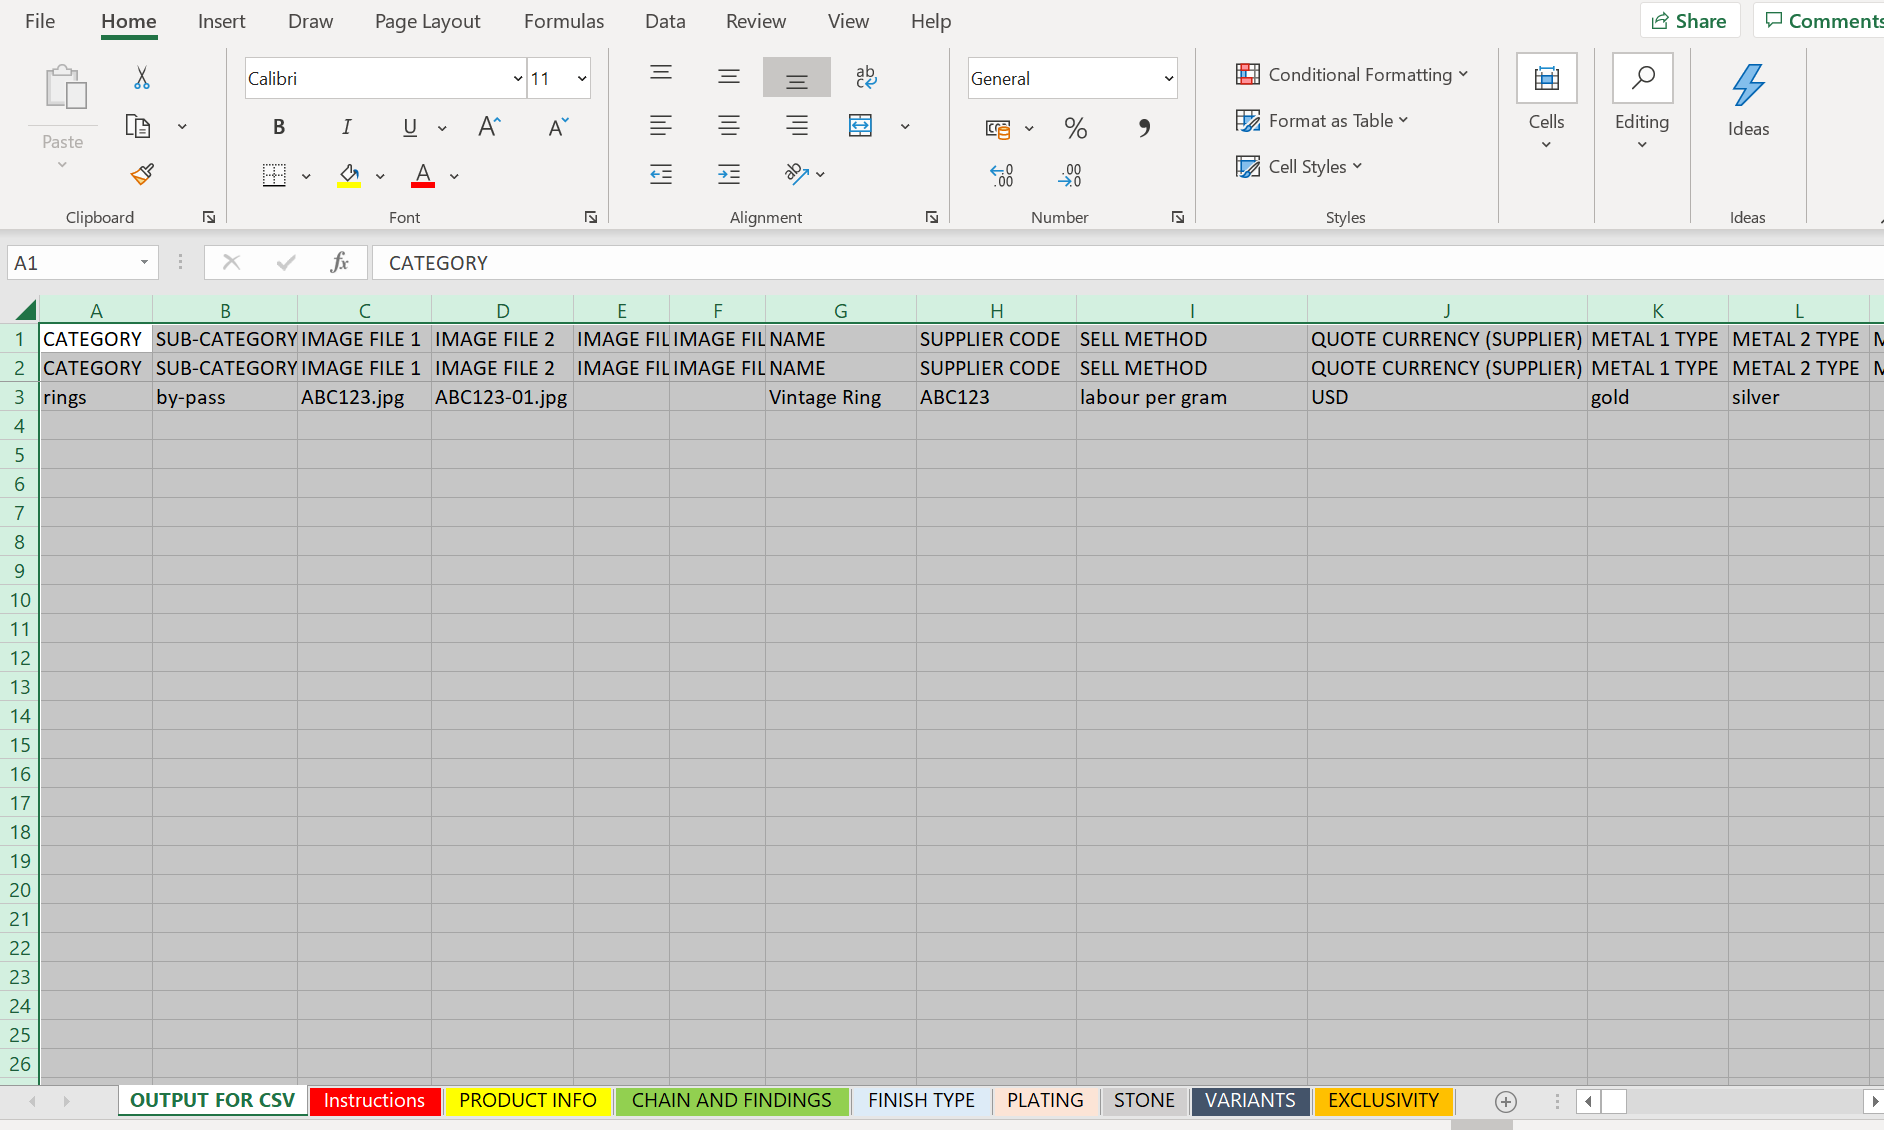
Enter the data in Product Info / Chain & Findings / Finish Type / Plating / Stone / Variant / Exclusivity tab and it will automatically generate an Output format in the 1st tab.
📔 Guidance on data input:
Instruction Tab. Please ensure to read Instructions detailed as this file has complex formulae and dependencies and can result in errors. Please pay attention to copy / paste instructions.
Product Info. Enter sample type, category, images file names etc from dropdown options or text entry as detailed in the column titles. Please note required and optional fields in column titles.
Chain & Findings. If your sample has a chain or finding which you would like to specify, please enter the relevant details. Please note required and optional fields in column titles.
Finish Type. Option to add up to 4 finishes when your sample has multiple finishes. Select from the list. Please note required and optional fields in column titles.
Plating. List details about Rhodium or Gold plating etc including micron details. Please note required and optional fields in column titles.
Stone. Enter Stone detail if the sample contains any stones, we suggest you should include the details. Please note required and optional fields in column titles.
Column O - Stone Price. Enter per carat or per piece sale price of the stones.Please note this is for guidance to the customer and not added separately in Quote price you have provided.
Enter this value in USD Only.
Variants. Enter the data here to upload samples in various metal titles and multiple sizes per metal title
Column D-L: Enter details related to 1st metal title of the sample.
Column M onwards - Enter size details for 1st Metal title item in mm.Atelier requires the size to be entered in mm so we can automatically convert it into any regional sizing preference set by users such as UK, USA or Japan, etc.
This enables suppliers to load samples in 1 measurement and serve customers in multiple regions. Please refer here for Size Conversion Chart.
Exclusivity. Enter data here for the samples which are exclusive to customers as a result of design collaboration etc.
Column C - Select Exclusive Customer. You would require your customer's Atelier System ID. Please contact us via support@atelier.technology to receive.
Column D. Select an exclusive sample either a specific metal title or All to assign exclusivity.
Column E - I. Select Exclusive Market as either All (for global exclusivity) or a specific country. You can select up to 5 countries.
💡 Tip: On Atelier buyers can use powerful Attribute filters to narrow down their search, for example, to find a specific carat weight range for diamond earrings in 18ct yellow gold. Accurately completing this level of data enables your samples to become more visible to browsing buyers. The more details you enter for the sample, the better the chance of visibility to buyers using Atelier.
⚠️ Caution: We strongly recommend loading all your metal titles to Atelier - even if you have not yet produced them in your ERP system. This is to avoid you accidentally:
- Replacing existing metal titles when trying to add new metal titles for the same sample
- Replacing existing sizes when trying to add new sizes for the same sample
Once your data is entered, you are ready to save the CSV file by using the below steps!
Step 4. Select worksheet "OUTPUT"
Step 5. Click the triangle button as shown below to select the entire file and then press Ctrl+C to copy all details
Step 6. Download the CSV template from Upload New (within Samples > Masterline on the main menu)
- Open the file
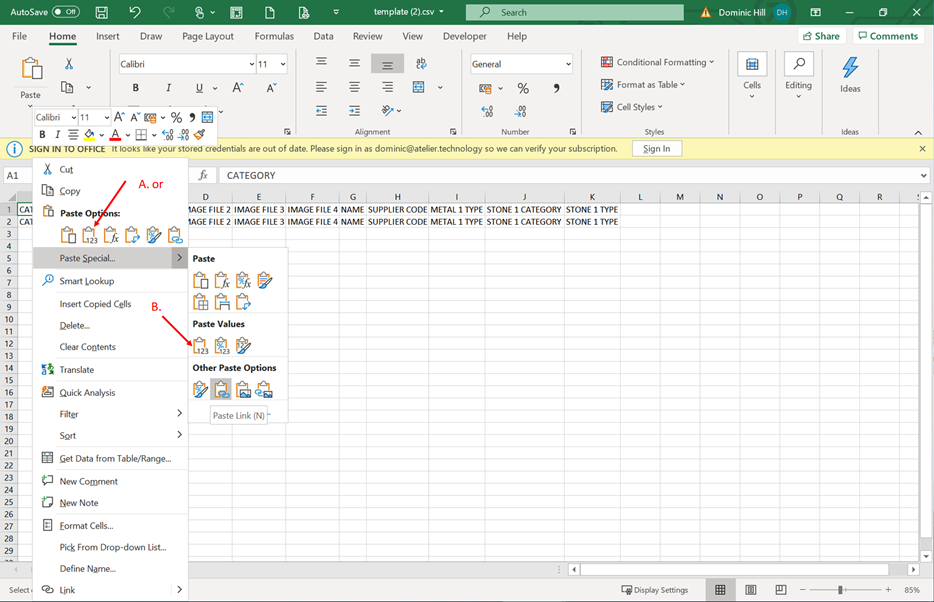
Step 7. Click paste with values in cell A1 - as shown below on the Style CSV file (downloaded from Atelier system in Step 2)
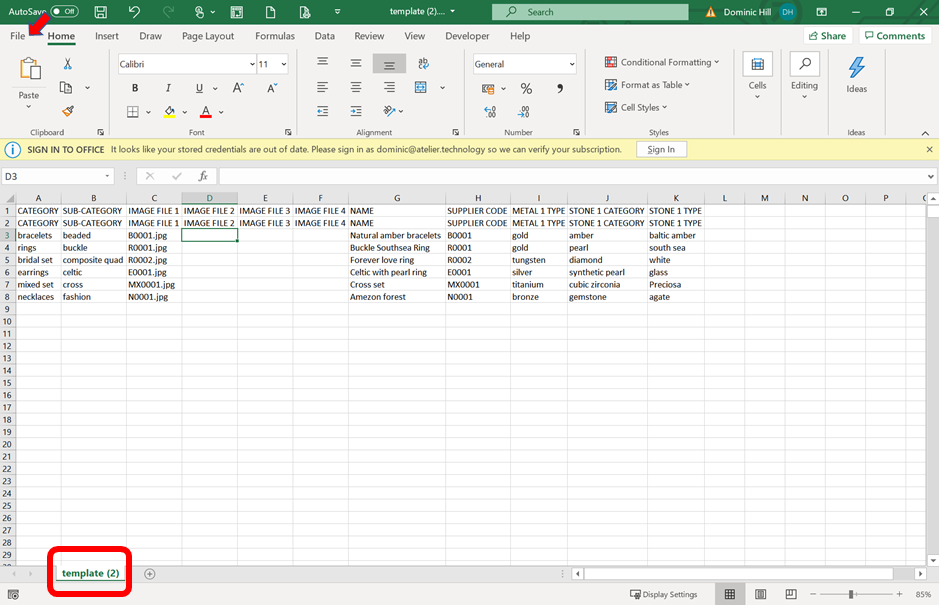
Step 8. Click 'File' as shown below.
Step 9. Select 'Save As', entitle a file name and select file type as 'CSV (Comma delimited) (*.csv)' as shown below.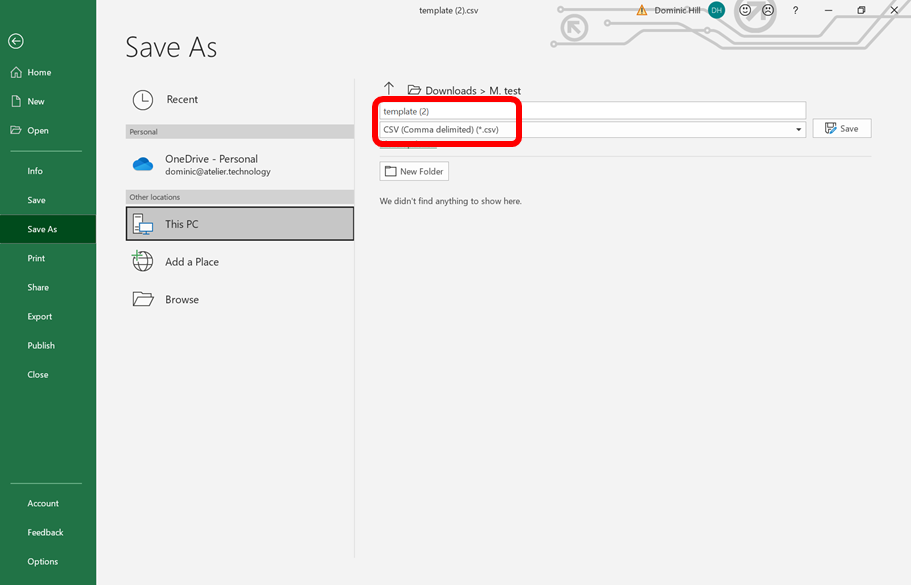
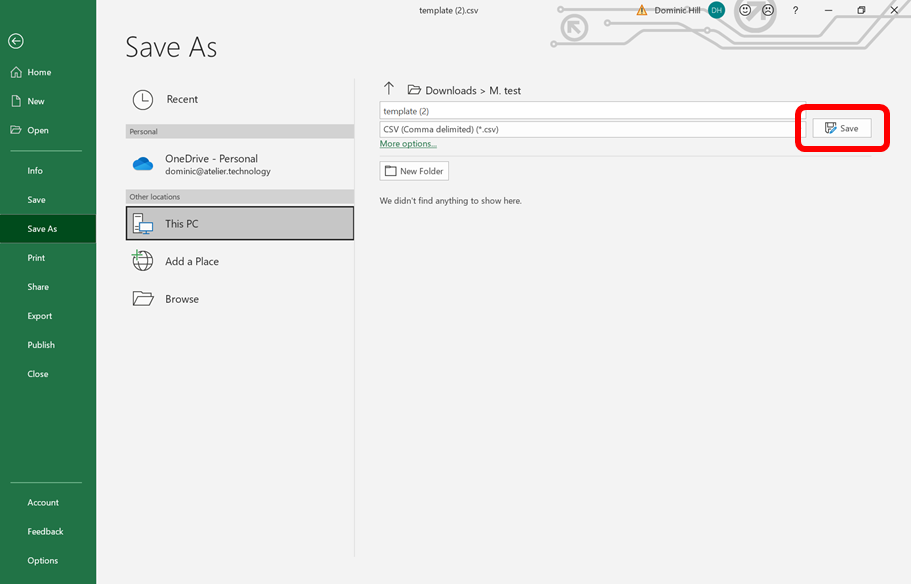
Step 10. Click 'Save' button as shown below
Step 11. Your .csv file is now saved to your computer and ready to be uploaded to Atelier.
Step 12: Navigate to Samples> Upload New page and Upload the exact images you have listed in your data file.
⚠️ Warning to avoid validation errors:
- Your data will only validate if the corresponding images are already loaded to the system
- Your corresponding images are the file names you entered in Product Info / column C (and optionally in columns D,E and F if you have more than one image per sample)
Step 13: Check any image error messages and remove disqualified images if necessary.
Troubleshoot the errors by following tips in the article here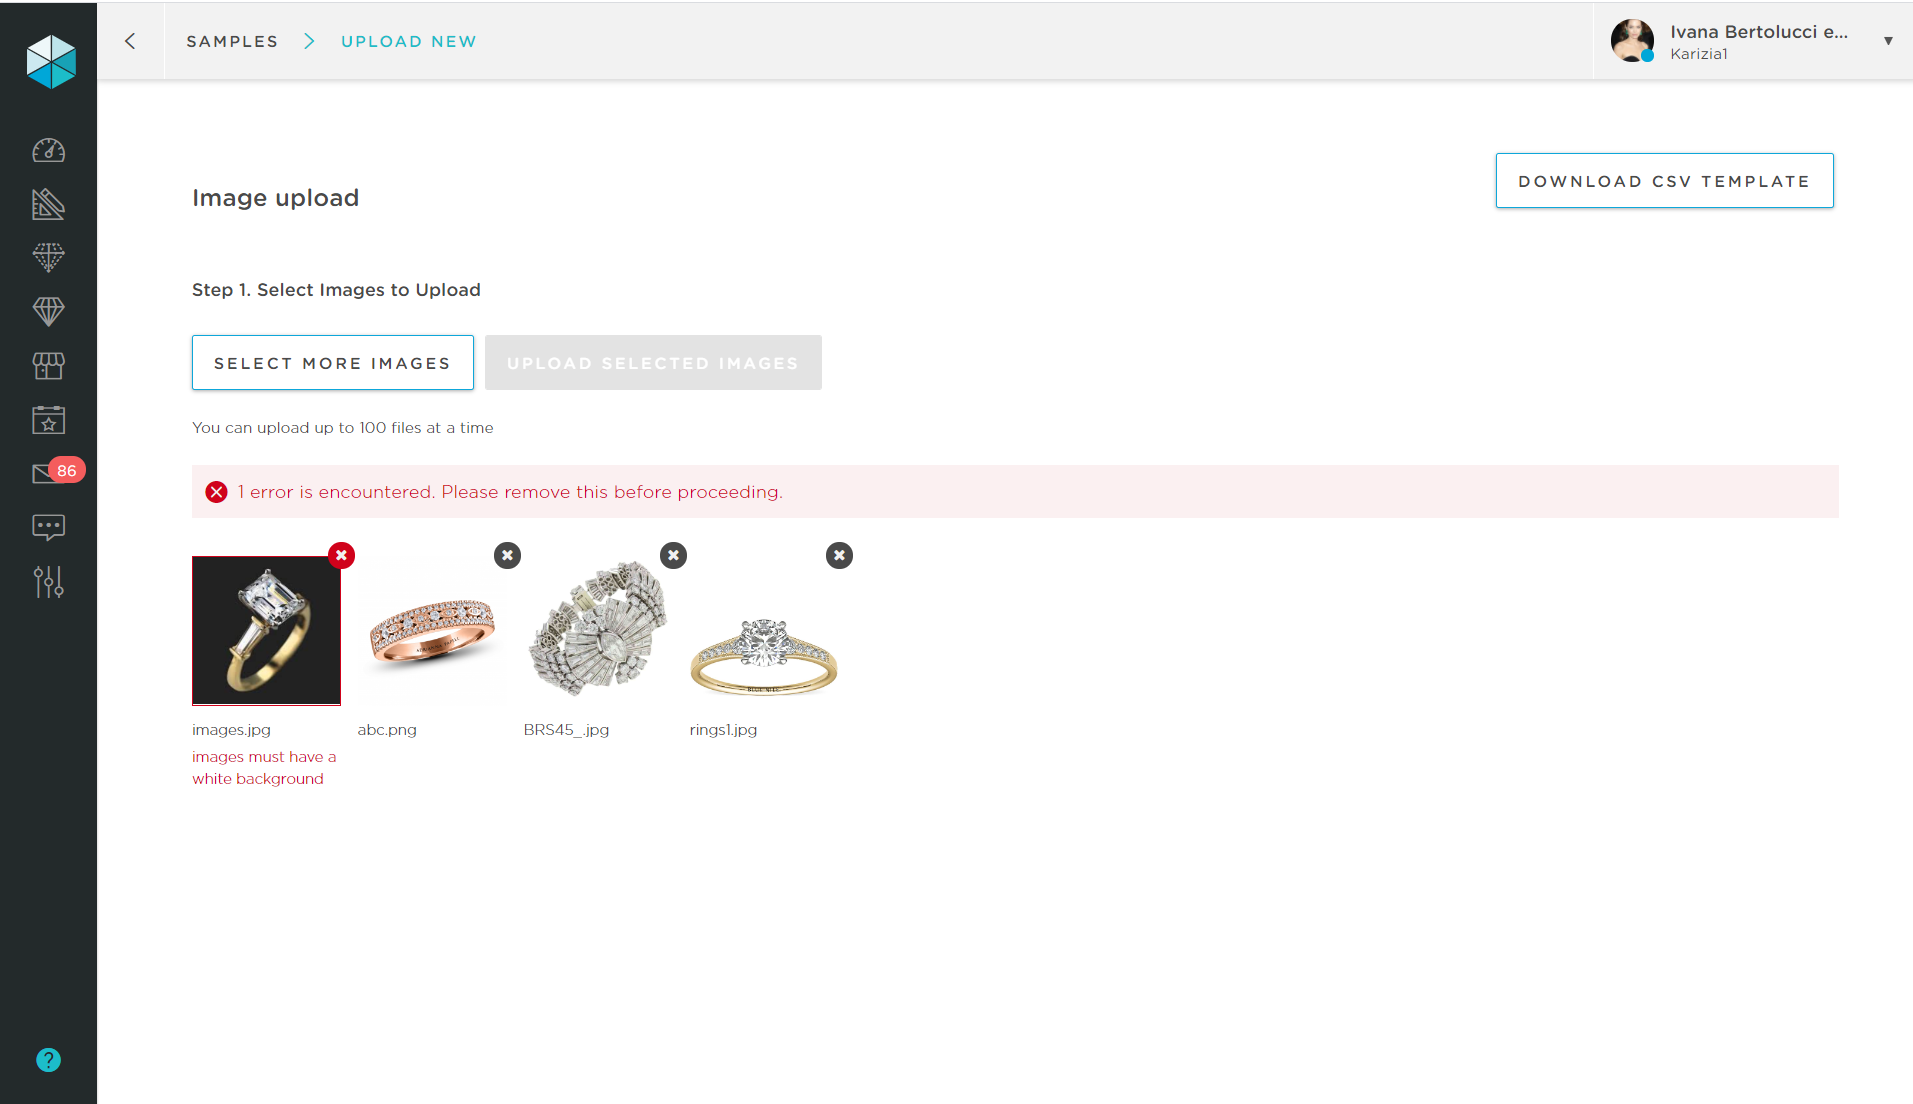
Step 14: Select your CSV file we prepared together.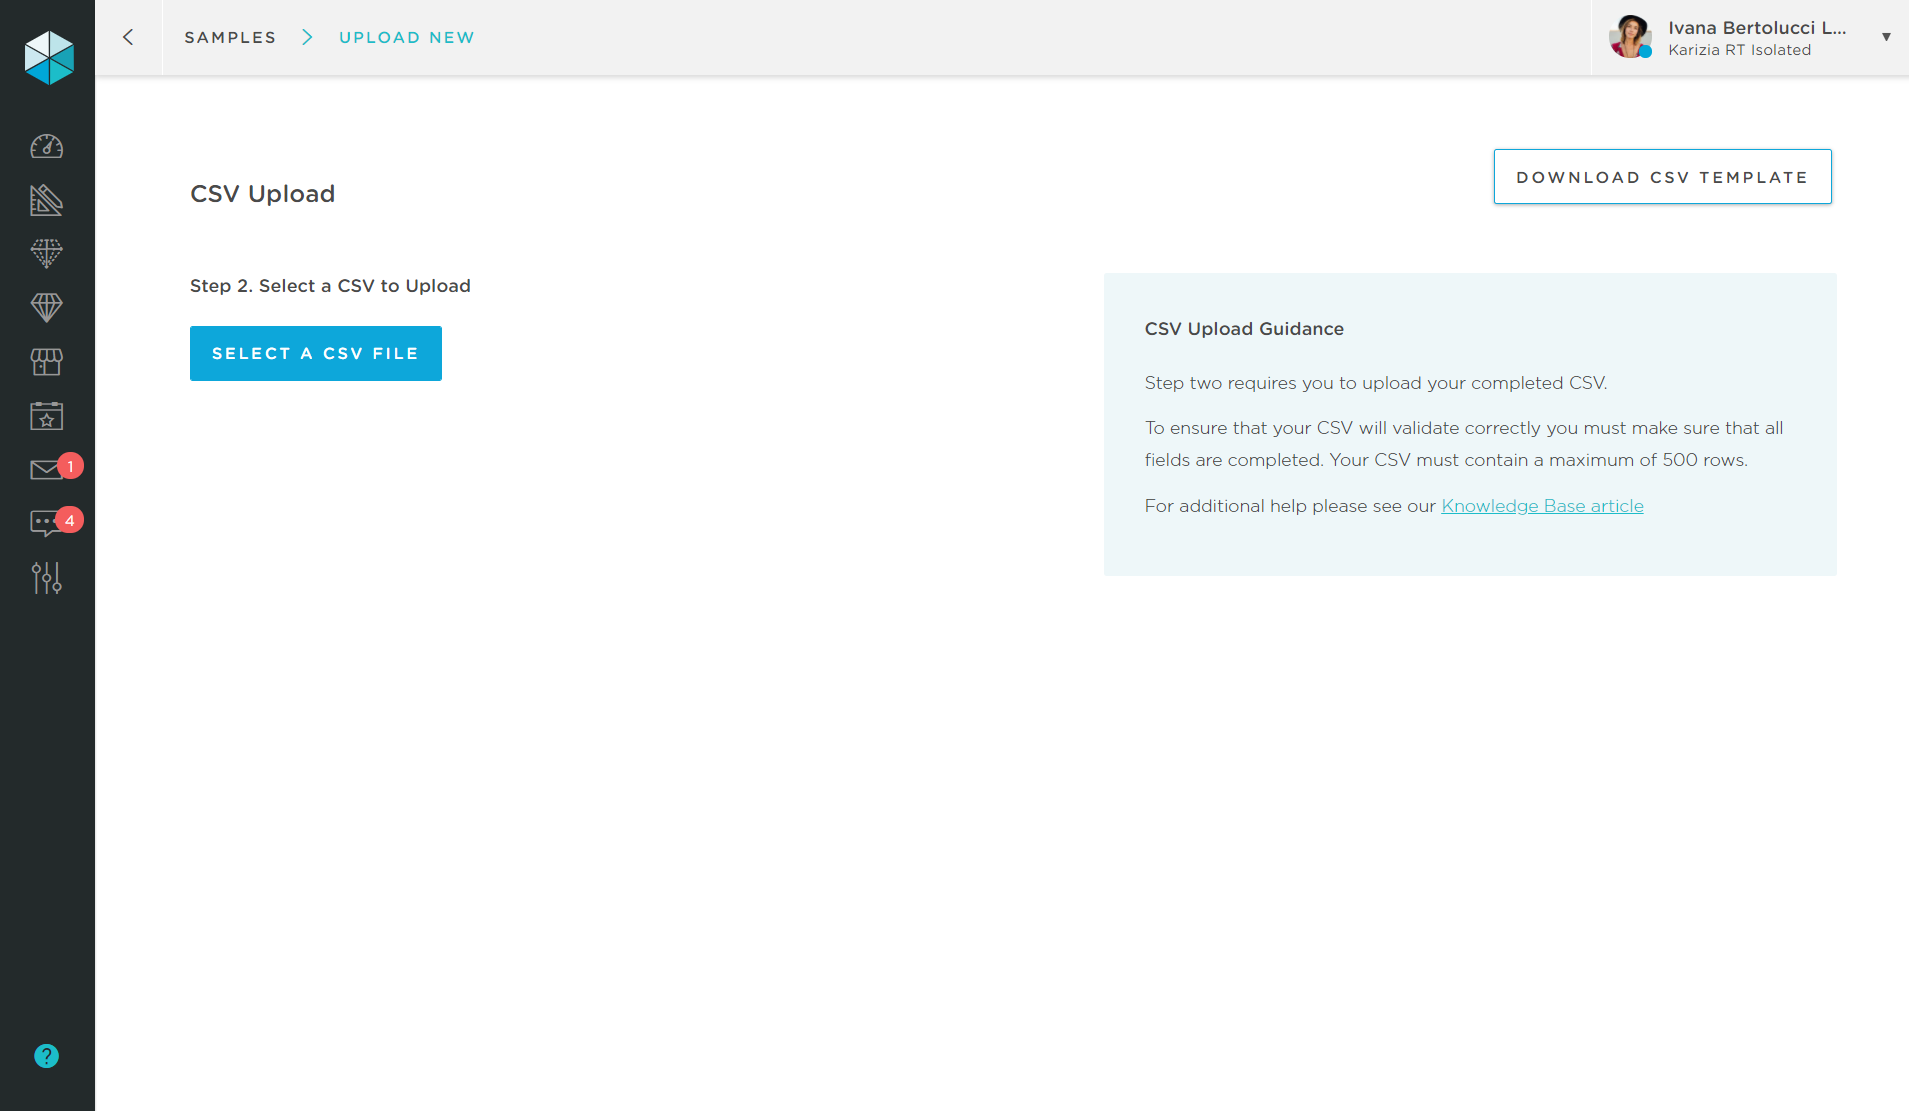
Step 15: Clear any errors you may have made when entering data.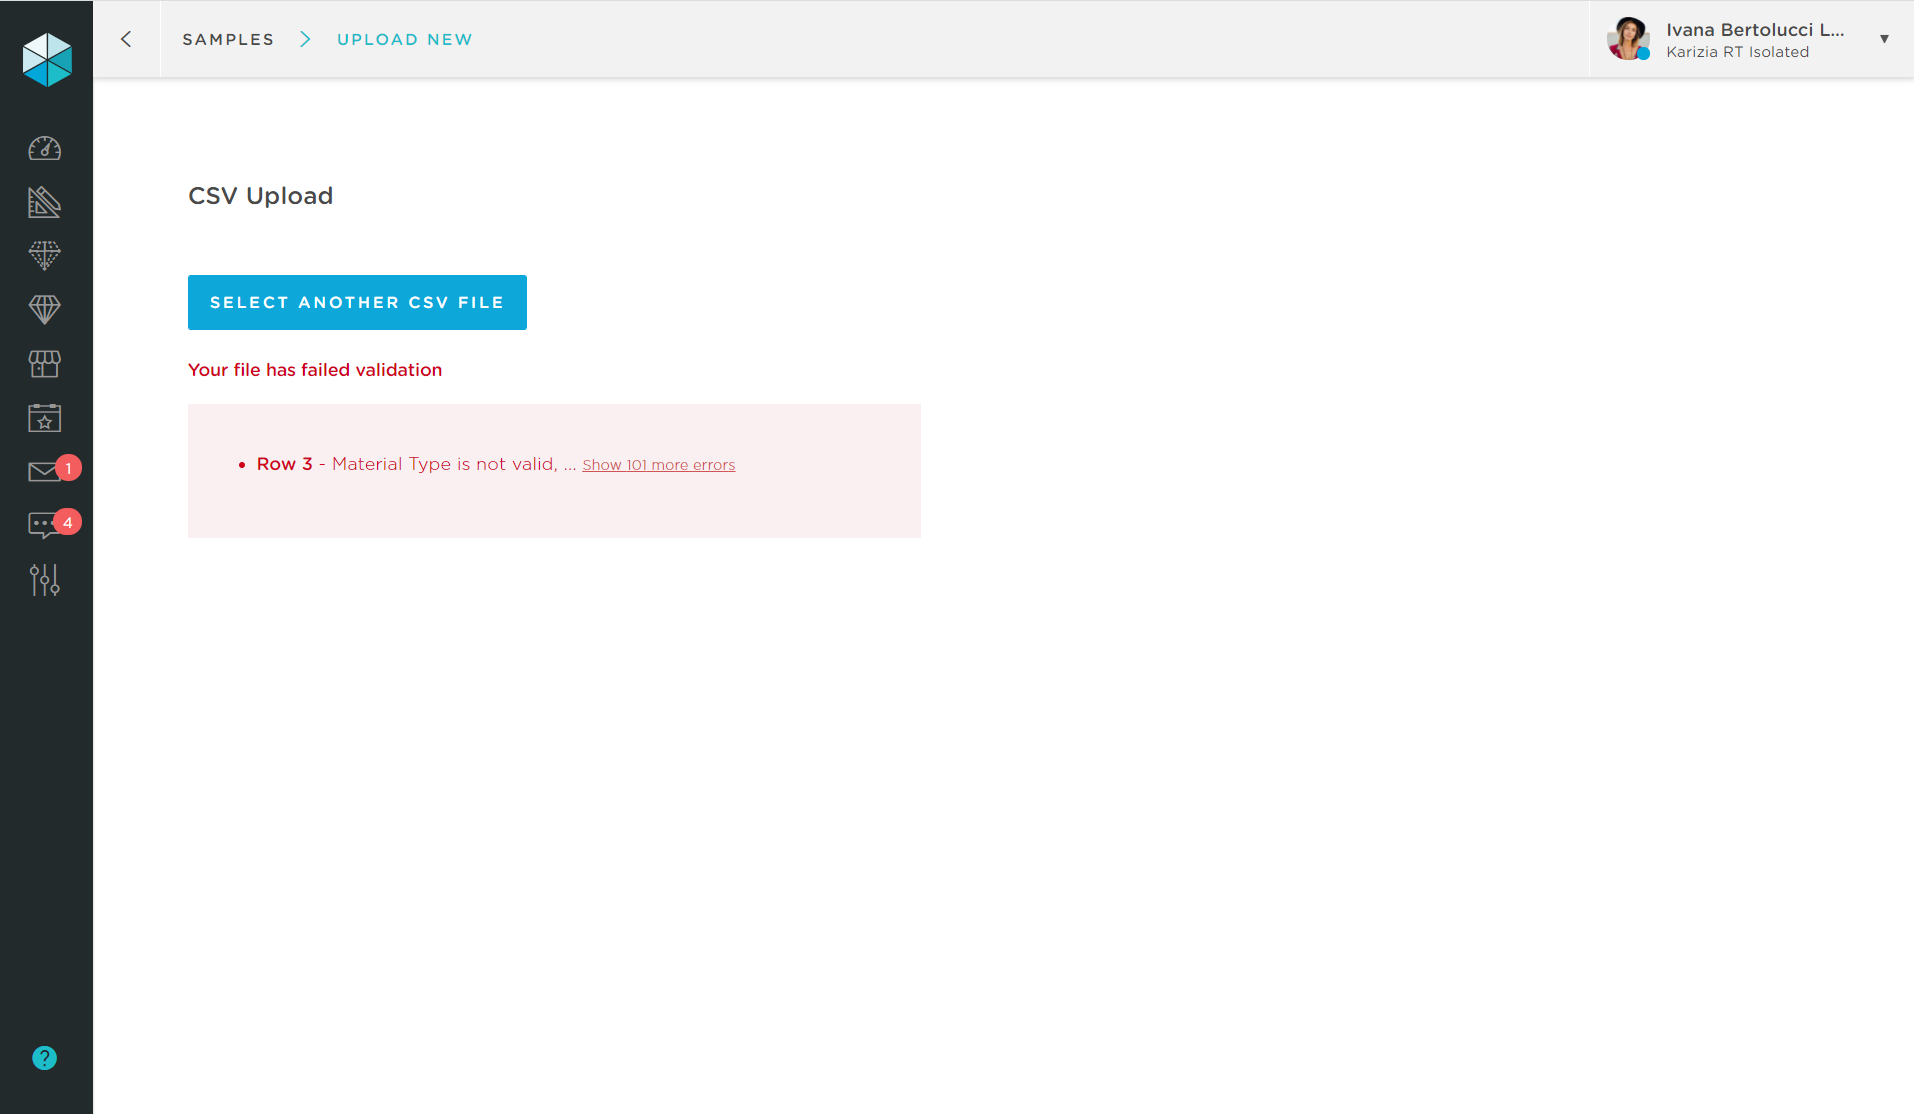
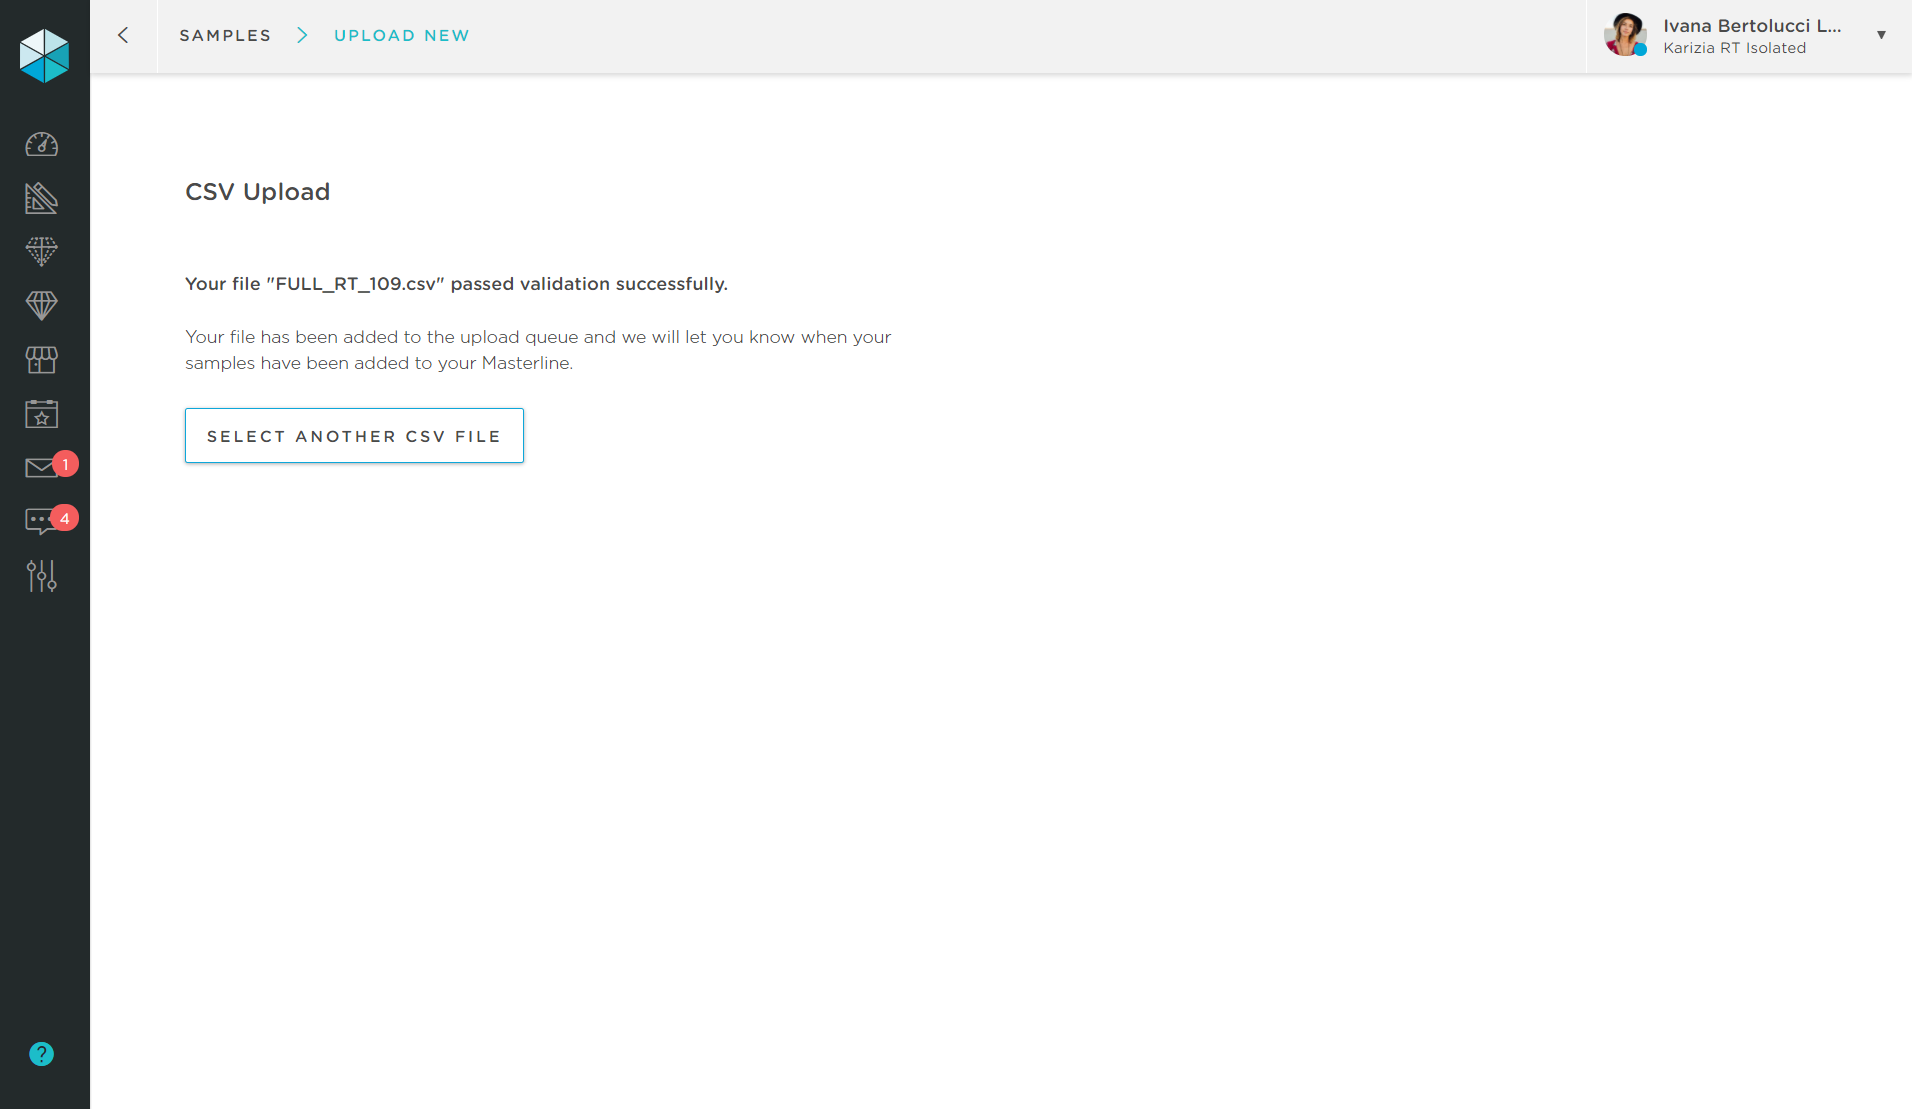
Step 16: Once validation is complete, your file will be placed in the queue system and you will receive a notification (see your main menu) once your Samples have been successfully added to your masterline.
If you need any further assistance please contact your local success team member or email your account manager.
